

These Zebra-Striped Chocolate Malted Shortbread Cookies will impress even the harshest of cookie critics (Santa?)! They have a rich, buttery flavor and a tender texture. And they look like little works of art! These cookies will seriously dress up any cookie tray!
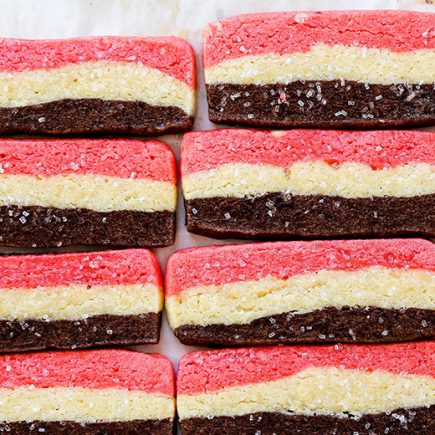
It took me a couple of attempts to get a design that I was happy with. I had originally wanted to create round cookies with stripes going across, which I envisioned would look like Christmas tree ornaments. But the opinions from those around me were that they looked like either basketballs, pumpkins or butts. Not really what I had in mind! So I decided to change directions and try this method that I had been ogling from Jaja Bakes. And I’m so glad that I did! Because these Zebra-Striped Chocolate Malted Shortbread Cookies came out way cuter than my initial efforts.
Making these Zebra-Striped Chocolate Malted Shortbread Cookies is not as hard as it looks. I swear! The base dough recipe is made with just butter, powdered sugar, an egg yolk, vanilla extract, flour and salt. This dough is split in half and one portion is mixed with malted milk powder and the other portion is mixed with unsweetened cocoa powder (you don’t even have to clean your mixer in-between!). These are our two layers.
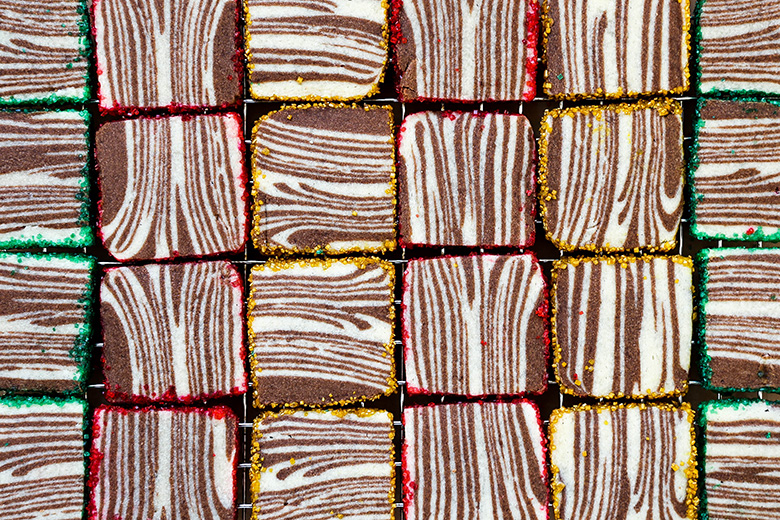
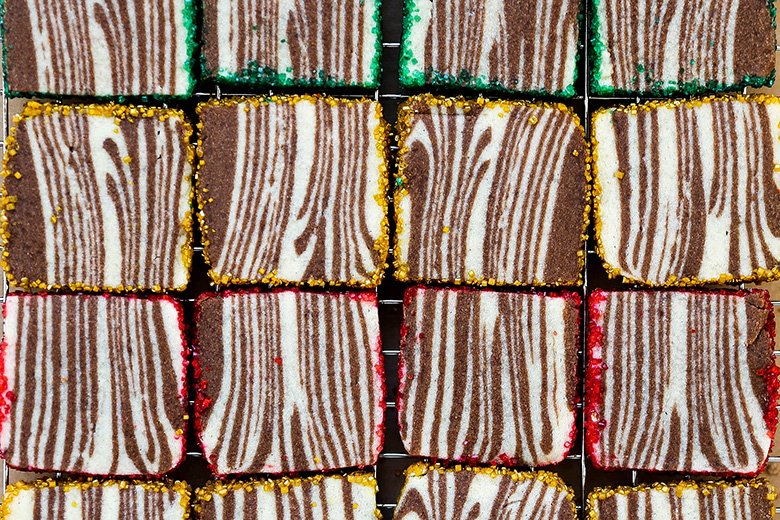
To create the zebra-stripe look, start by creating a stack of alternating layers of dough. Then press down on the stack to compress the layers together. Now cut the stack in half, re-stack the two halves together and press down to compress the layers once again. Repeat that whole process about two more times. And that’s it! No rolling pins or fancy gadgets required.
The process kind of reminds me of laminating dough. But instead of folding and rolling the dough to create layers, we’re cutting, stacking and pressing the dough with our hands.
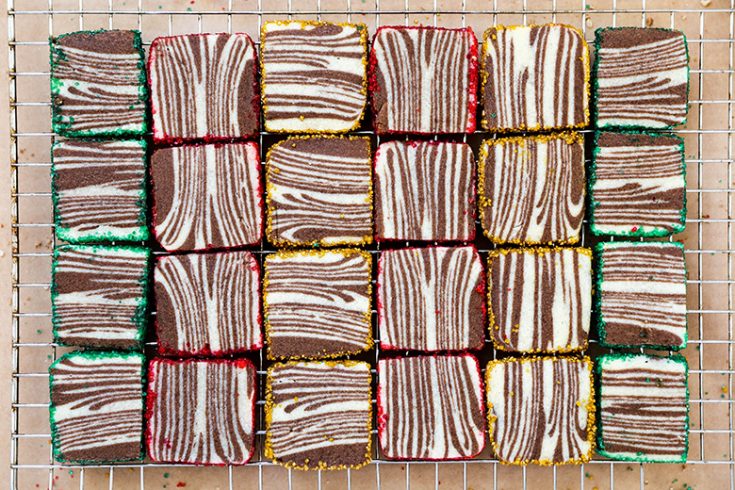
While you’re working, it’s a good idea to continuously pat/press on the sides and top of the dough to try and maintain the rectangular shape of the stack as much as possible. This will give you the cleanest edges in your final cookies. If you have a side that’s really wonky and uneven, you can trim it off with a sharp knife at the end of the process.
Traditional shortbread recipes don’t use an egg. But since we’re handling the dough a lot here, I decided to add an egg yolk to make it less crumbly and more pliable. You might need a light coating of flour on your hands as you shape the dough to prevent it from sticking. But overall, I found it very easy to work with.
Don’t toss your egg white. You’ll use it later to help the decorating sugars adhere to the cookies.
After all your layering is completed, it’s just chill, slice and bake!
My favorite thing about these Zebra-Striped Chocolate Malted Shortbread Cookies is that each cookie turns out unique. They are the snowflakes of the cookie world!
If you make my Zebra-Striped Chocolate Malted Shortbread Cookies this Holiday season, I’d love to see how they turned out!
Cheers,
Liz
Zebra-Striped Chocolate Malted Shortbread Cookies
Ingredients
For the Shortbread:
- 1 cup (16 tablespoons) unsalted butter, softened at room temperature
- 1 cup powdered sugar
- 1 egg yolk
- 1 tsp. vanilla extract
- 2 cups all-purpose flour
- 1/2 tsp. salt
- 2 tablespoons malted milk powder
- 2 tablespoons unsweetened cocoa powder
For Decorating:
- 1 egg white, whisked
- Colored decorating sugars
Instructions
- In your stand mixer fitted with the paddle attachment, beat the butter and powdered sugar until smooth and well combined, about 2-3 minutes. Scrape down the sides of the bowl. Add the egg yolk and vanilla extract and beat to combine.
- Add the flour and salt and beat on low speed until just combined and no more white streaks remain. Scrape down the sides of the bowl.
- Dump the cookie dough out onto a piece of parchment paper that’s lightly dusted with flour and use your hands to bring it together into a smooth ball. Then divide the dough into 2 equal-sized portions.
- The make the malted milk dough, place one portion of the cookie dough back into the bowl of your stand mixer (no need to clean it out). Add the malted milk powder and beat until the malted milk powder is fully incorporated. Remove, bring the dough together into a ball and set it aside.
- To make the chocolate dough, place the second portion of the cookie dough back into the bowl of your stand mixer. Add the cocoa powder and beat until the cocoa powder is fully incorporated. Remove, bring the dough together into a ball and set it aside.
- Divide the malted milk dough and the chocolate dough into 2 equal-sized portions (so you’ll have 4 portions) and use your hands to shape them into rectangles. You can coat your hands lightly with flour to prevent the dough from sticking. Stack the 4 portions on top of each other, alternating the layers. Then press down gently, flattening the stack to about half its original thickness. Use your hands to pat the sides and top, making them as straight and even as possible.
- Cut the stack vertically in half, so now you have 2 rectangular portions. Stack the 2 portions on top of each other and then press down gently, flattening the stack to about half its original thickness. Use your hands to pat the sides and top, making them as straight and even as possible. Repeat this process 1-3 more times. I don’t recommend doing more, because the layers will start to get too thin and blend together.
- Once you’re done creating the layers, use your hands to even out the sides and top of the stack, making them as straight and even as possible. My final rectangle was approximately 8 X 4 X 2-inches. Wrap the dough tightly in plastic wrap. Then transfer to your refrigerator to chill for at least 4 hours or up to overnight.
- Pre-heat your oven to 325 degrees. Line two baking sheets with parchment paper and set aside.
- Remove the dough from your refrigerator and unwrap it. Cut it in half lengthwise, so you have two long, cubed portions. Working with one portion at a time, brush the outside with some of the beaten egg white. Then roll the portion into decorating sugar, pressing down gently to help it adhere. Using a sharp knife, cut the dough into 1/4-inch thick slices. Place them on your prepared baking sheets, spacing them about 1-inch apart. Repeat with the second portion.
- Transfer the baking sheets to your pre-heated oven and bake for 11-13 minutes. The cookies won’t take on much color, but the sides and top should look set/dry. Remove the baking sheets from your oven and let the cookies rest for 2-3 minutes before transferring them to a wire rack to continue cooling. Cooled cookies can be stored in an airtight container at room temperature for 6-8 days.
Notes
Design and method inspired by Jaja Bakes.


Die Kekse sehen großartig aus, verwenden Sie US Cups für ihre Rezepte!?
Viele Grüße,
Gabriel