
This post was originally published here on February 3, 2014. I’ve since updated the photographs and text. Enjoy!
In case you haven’t heard the news (= Instagram), I broke my arm.
Yup. I took an epic fall on the ice on Monday and I landed HARD, resulting in a small fracture to my left arm. Along with some massive bruising to my body. And to my ego.
The good news is the fracture is in my non-dominant arm. And it’s very minor. No reduction, surgery or cast required. Just 4-6 weeks of being VERY careful and trying to rest as much as possible. Easier said than done.
So what does all this mean for my work? Well, I’m not 100% sure. I have yet to re-enter my kitchen. And I haven’t dared to try and pick up my camera. This recipe was the last one that I had saved in the queue. Which means that as I type this, I have nothing new coming down the pipeline. So you may not see much activity around these parts for a few weeks. Or maybe you will. I just don’t know. My arm is feeling better/stronger every day. But I’m also trying to not rush the healing process.
Anyway. That’s the current state of affairs.
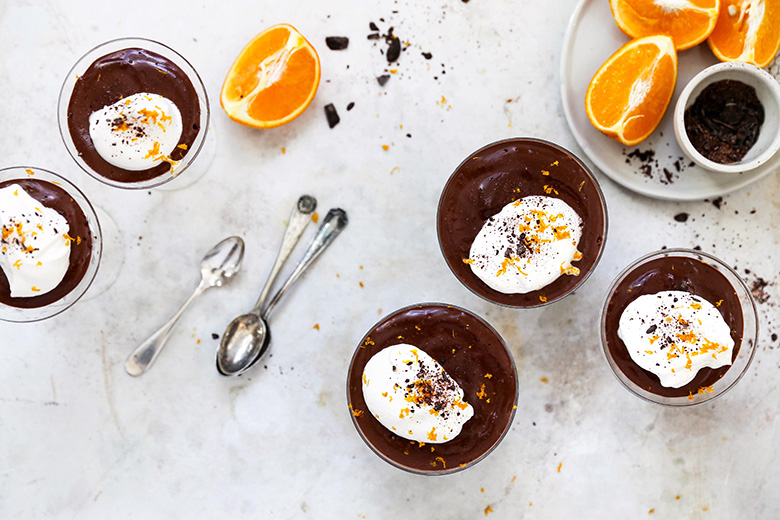
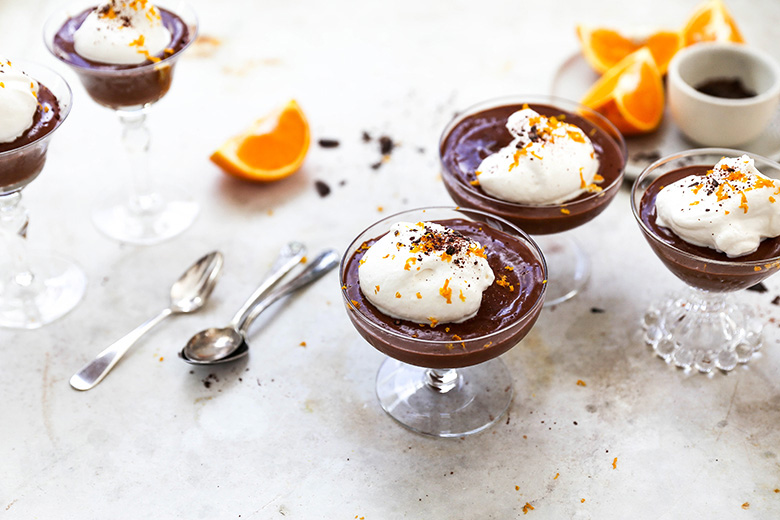
I made this Earl Grey and Orange Infused Blender Chocolate Mousse for Valentine’s Day this year. And I know that it looks all fancy and formal. But honestly, it’s not. It’s so easy that even with a broken arm, it can be done. Because the blender does ALL the work for you. It whips the ingredients into submission, creating a fabulously light and creamy no-bake chocolate dessert that is to die for.
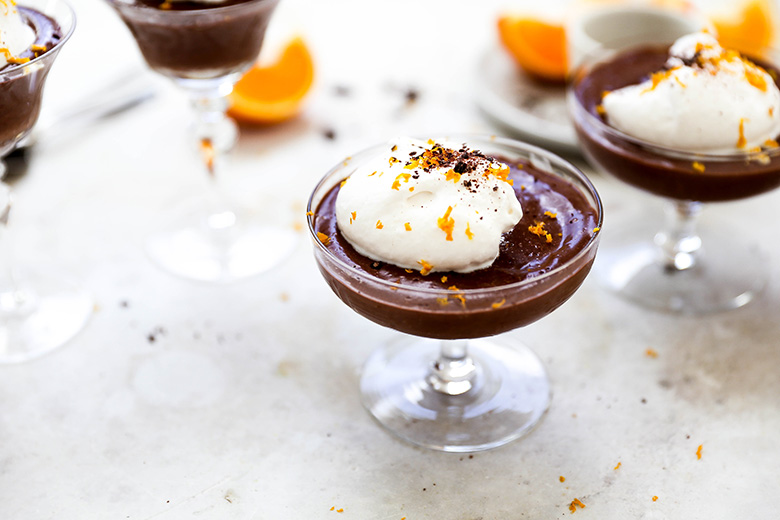
The original recipe for this dessert comes from Food52. I’ve made a few minor adjustments, including adding additional orange flavor to the mousse and infusing the whipped cream with Earl Grey as well (a worthwhile step, but remember to plan ahead because the heavy cream needs time to chill completely before you whip it). And through trial and error, I’ve also discovered that the original recipe should really be doubled to ensure perfect results every single time. In the past, I sometimes couldn’t get the mousse to be the right consistency, and I think that was due to a lack of ingredient volume in my blender. You know how sometimes when you have too few ingredients in the bottom of your blender, it doesn’t blend properly? Yup. That’s what was happening to me. So now, I just always double it (which is reflected in the instructions below), and the recipe has yet to fail me. You’ll end up with a generous number of servings this way. But hey, having extra chocolate mousse stashed in your refrigerator in case of an emergency (like say, a broken arm!) isn’t a bad thing.
Cheers,
Liz

Earl Grey and Orange Infused Blender Chocolate Mousse
Ingredients
For the Whipped Cream:
- 1 cup heavy whipping cream
- 1 Earl Grey tea bag
- 2 tablespoons powdered sugar
For the Mousse:
- 1 cup water
- 2 tablespoons plus 2 teaspoons granulated sugar
- 2 Earl Grey tea bags
- Peel from 1 orange
- 12 ounces dark chocolate, roughly chopped
- 2 tsp. vanilla extract
- 4 egg whites
Instructions
- Gently warm the heaving whipping cream in a small saucepan over medium heat until small bubbles start to form around the edges. Do not allow the cream to come to a boil. Remove the saucepan from the heat and add the tea bag. Then cover the saucepan and place it in your refrigerator until the cream is well chilled, about 4 hours.
- Meanwhile, in a medium saucepan over medium-high heat, combine the water and granulated sugar. Bring the mixture to a boil, stirring until the sugar is dissolved. Then add the tea bags and orange peel. Remove the saucepan from the heat, cover and let steep for 5 minutes.
- Add the chopped chocolate and vanilla extract to your blender. Then strain the steeped liquid directly into your blender over the chocolate, discarding the tea bags and orange peel. The steeped liquid will immediately begin to melt the chocolate.
- Cover and blend on high for 30 seconds. Then add the egg whites and blend for an additional 60 seconds.
- Scrap down the sides of your blender with a spatula. Then divide the mousse into 6-8 small serving containers. Cover and refrigerate until set, about 2-4 hours.
- While the mousse sets, finish making the whipped cream. Place the bowl of your stand mixer and the whisk attachment in your freezer to chill for 5-10 minutes. Remove and immediately add the chilled whipped cream (removing and discarding the tea bag) and start whisking on medium-high speed. Once the cream starts to thicken, add the powdered sugar and continue whisking until soft peaks form. Refrigerate the whipped cream until you’re ready to use it.
- To serve, top the mousse with the whipped cream. Garnish with chopped chocolate and orange zest, if desired.
Notes
Recipe barely adapted from Food52.


Liz, this looked delicious! I used a combination of a Earl Grey Pot de Creme and this recipe to make my earl grey pot de creme for tomorrow night’s dessert. I cannot wait to eat them! I’m loving how these are pretty light for a dessert which will really let the chocolate shine through 🙂
Yeah! That’s awesome Bri! Thanks for letting me know you made them. Wish I had one right now! 🙂
10 min? Or 10 min after 4 h in the fridge? 😖
I’m not sure which step in the instructions you’re referring too? Can you clarify? Thanks!
This chocolate mousse looks dreamy!
It’s the dreamiest!
I love chocolate mousse and I love how you take it up a notch with these great flavor additions of early grey and orange!
Thank you! I hope you try it out!
Hi, made this twice and loved it. Thank you!
Yay – that’s awesome to hear! I’m so glad!
Nothing bad about having a bit of mousse in the fridge… and you’ve got me craving it now – omg! I love this update.. it is just gorgeous and so delicious. Your arm Liz!! Oh my goodness…. that must of hurt so much. I’m so sorry to hear. I hope you heal fully and quickly, and no more falls!
Thanks, Traci. I’m hoping all the snows leaves us soon so I can walk outside more confidently!
Liz, this looked delicious! I used a combination I’m loving how these are pretty light for a dessert which will really let the chocolate shine through
So glad you love them!
this is a nice blog thanks for sharing the information
Thank you.